11ty-Notes

一樣來做個筆記。

Config

推薦閱讀:https://www.11ty.dev/docs/config/

在根目錄建立 .eleventy.js,這個檔案就是 11ty 的 config,可以在裡面寫入我們想要的設定:

1
2
3
4
5
6
7
8
9
10
11
12
13
module.exports = function (eleventyConfig) {
return {
dir: {
input: 'src',
includes: '_includes',
output: '_site'
},
templateFormats: ['md', 'njk', 'html'],
markdownTemplateEngine: 'njk', // 讓你可以在 markdown 裡面寫 njk,底下以此類推。
htmlTemplateEngine: 'njk',
dataTemplateEngine: 'njk'
}
}

Basic Structure

1
2
3
4
5
6
7
8
9
10
11
├── _site
│   ├── index.html
│   └── src
│   └── index.html
├── package-lock.json
├── package.json
└── src
├── _includes
│   └── layouts
│   └── base.html
└── index.html

學任何一項知識前,先理解專案結構是很重要的一部分,所以這邊分別說明一下:

  • _site 是產生後的靜態檔案
  • src 進入點
  • src/_includes 放置樣板的地方
  • src/_includes/layouts/base.html 樣板一(整個網站的基礎結構)
  • src/index.html 網站首頁

運用樣板來取代 Hardcode

延續剛剛的檔案結構,假設目前首頁(src/index.html)內容是這樣:

1
2
3
4
5
6
7
8
9
10
11
12
13
<!DOCTYPE html>
<html lang="en">
<head>
<meta charset="UTF-8" />
<meta http-equiv="X-UA-Compatible" content="IE=edge" />
<meta name="viewport" content="width=device-width, initial-scale=1.0" />
<title>網站標題</title>
</head>
<body>
<h1>首頁</h1>
<p>一些敘述</p>
</body>
</html>

看起來就是一般的 HTML,沒什麼問題。但有一個問題是「如果我想要再新增其他頁面呢?」

假設現在想新增一個「關於我」的頁面,那我可能就需要再寫一份 about.html

1
2
3
4
5
6
7
8
9
10
11
12
13
<!DOCTYPE html>
<html lang="en">
<head>
<meta charset="UTF-8" />
<meta http-equiv="X-UA-Compatible" content="IE=edge" />
<meta name="viewport" content="width=device-width, initial-scale=1.0" />
<title>關於我</title>
</head>
<body>
<h1>關於我</h1>
<p>一些敘述</p>
</body>
</html>

可以看到我們只修改了 <title><body> 中的內容,而其他部分是一模一樣的

這顯然不是一個很好的做法。

在非必要的情況下我們會盡可能避免「Hardcode(寫死)」的作法,所以 11ty 中可以透過 Nunjucks 這套模板引擎來處理。

首先,我們可以在 src/_includes/layouts 底下建立一個 base.html,並填入底下內容:

1
2
3
4
5
6
7
8
9
10
11
12
<!DOCTYPE html>
<html lang="en">
<head>
<meta charset="UTF-8" />
<meta http-equiv="X-UA-Compatible" content="IE=edge" />
<meta name="viewport" content="width=device-width, initial-scale=1.0" />
<title>{{ title }}</title>
</head>
<body>
{{ content | safe }}
</body>
</html>

一般來說,你應該是建立一個 .njk 檔案,才接著在裡面寫 HTML,而不是像這邊建立一個 .html 檔案,然後直接在裡面寫 nunjucks 的語法。
為什麼?因為正常的 HTML 並沒有辦法解析 nunjucks 的語法。這邊之所以能這樣做是因為前面在 .eleventy.js 中有寫入對應的設定,所以 eleventy 才會知道要用 nunjucks 去解析 .html 檔案的內容。

模板的好處就是可以在裡面加入「變數、流程判斷」等程式語言的特性。這邊在 <tilte> 中放入了一個 {{ title }},意思是說裡面的文字要是 title 這個變數的值,而 <body> 也是同樣的概念。

不過你可能會想問「那 titlecontent 這兩個變數要從哪裡來?還有,content 後面的 | safe 又是什麼東西?」

回答第一個問題前,我們先把 src/index.html 做點修改:

1
2
3
4
5
6
7
8
9
10
11
---
layout: layouts/base.html
title: Learn 11ty
---

<h1>I am the Home Page.</h1>
<p>
Lorem ipsum dolor sit, amet consectetur adipisicing elit. Odio quidem non dolor, placeat
blanditiis quas itaque distinctio optio aperiam. Tenetur sequi quasi ea perferendis iste quia
itaque fugit, distinctio magni.
</p>

註:再提醒一次,之所以能直接在 HTML 中寫 Front Matter 的語法是因為在 eleventy.js 中有做設定。

把東西寫在 --- 裡面的這種寫法叫做「Front Matter」,是 markdown 提供的一種語法,一般是用來寫入網頁的 meta 資訊。

這裡在 Front Matter 中指定了 layout: layouts/base.html,代表說這邊的內容要套到用前面寫好的樣板,並且也指定了 title 的內容。

看到這邊,應該不難猜到 titlebody 這兩個變數的值就是從這邊來的,值會是 Learn 11ty<body> 中的內容。

至於第二個問題,要先知道 | 是 nunjucks 中的 Filter。功能就跟 CLI 裡面的那個 | 差不多,會把前面的東西「接過來」做一些處理。

所以這裡的 | safe 很明顯是把前面的字串都做「跳脫」的處理,主要是為了避免 XSS 的問題。

除了上面這種拿寫好的樣板來用以外,nunjucks 還提供了很多功能,像是 extendsinclude 等等,在實務上會蠻常看到它們的,所以強烈建議碰到不懂的語法時可以到 nunjucks 的 官方文件 中查閱。

讀取靜態資源

推薦閱讀:https://www.11ty.dev/docs/copy/

假設目前專案的資料結構長這樣:

1
2
3
4
5
6
7
8
9
10
11
12
13
├── package-lock.json
├── package.json
└── src
├── _includes
│   ├── head.html
│   └── layouts
│   ├── base.html
│   └── contact.html
├── assets <- 新增 assets 資料夾
│   └── images
│   └── carbon.png
├── contact.html
└── index.html

這時候你可能會想在模板中存取在 assets 中靜態資源,這些資源可以是圖片、影片或 CSS 等等。不過當你寫好路徑後你會就發現存取不到,這是為什麼呢?

這是因為 11ty 預設不會把 .html 以外的檔案或資料夾產生到 _site 底下,所以必須在 config 加入 addPassthroughCopy 來處理:

1
2
3
4
5
6
7
8
9
10
11
12
13
14
15
16
module.exports = function (eleventyConfig) {
// 把指定路徑的內容複製到 _site 下
eleventyConfig.addPassthroughCopy('src/assets')

return {
dir: {
input: 'src',
includes: '_includes',
output: '_site'
},
templateFormats: ['md', 'njk', 'html'],
markdownTemplateEngine: 'njk',
htmlTemplateEngine: 'njk',
dataTemplateEngine: 'njk'
}
}

設定好 11ty 以後整個 assets 就會被複製過去,自然就能讀取到對應的資料了。

像元件一樣的 Shortcode

推薦閱讀:https://www.11ty.dev/docs/shortcodes/

11ty 提供了 Shortcode 的功能,讓你可以用很像 Component 的概念來封裝一段 HTML,我們直接來看範例。

首先到 _includes 底下建立一個 Card.js

1
2
3
4
5
6
7
8
9
10
11
12
const { html } = require('common-tags')

function Card({ title, link, linkText, raised }) {
return html`
<div class="card__container blah blah ${raised ? 'card__container--raised' : ''}">
<h2 class="card__title">${title}</h2>
<a class="card__link" href="${link}">${linkText}</a>
</div>
`
}

module.exports = Card

註:這邊的 html(樣板字串)是 common-tags 提供的功能。

接著到 .eleventy.js 加入這段:

1
2
3
4
5
6
7
8
9
10
11
12
13
14
15
16
17
18
19
20
21
22
// 別忘了引入
const Card = require('./src/_includes/components/card')

module.exports = function (eleventyConfig) {
eleventyConfig.addPassthroughCopy('src/assets')
eleventyConfig.addPassthroughCopy('src/css')

// 加上這一行
eleventyConfig.addShortcode('Card', Card)

return {
dir: {
input: 'src',
includes: '_includes',
output: '_site'
},
templateFormats: ['md', 'njk', 'html'],
markdownTemplateEngine: 'njk',
htmlTemplateEngine: 'njk',
dataTemplateEngine: 'njk'
}
}

接下來在模板中就可以這樣使用:

1
{% Card title="Hello", link="https://google.com", linkText="Go to Google" %}

註:記得要每個參數間要用 , 來隔開。

Collections

推薦閱讀:https://www.11ty.dev/docs/collections/

collections 是用來存取在 Front Matter 中有使用 tags 標註的內容,例如說:

1
2
3
4
5
6
7
8
9
---
title: Rxjs Crash Course
description: This is a post on about Rxjs Crash Course.
date: 2018-08-25
layout: layouts/post.html
tags: posts
---

...

想像這是部落格裡面的某一篇文章,並且把 tags 設為 posts,這樣的用途是什麼?

在 11ty 中 tags 是一個比較特別的屬性,一旦設置了這個屬性後就會 11ty 就會自動產生一組對應的 collections。以上面的例子來說,我們設置了 tags: posts,所以就會產生一組叫做 posts 的 collections。

collections 可以做什麼?這邊來舉個例子。

假設你想要有一個顯示「文章列表」的頁面,你可以透過 collections 來把所有 posts 的文章資料都拿出來:

1
2
3
4
5
6
7
8
9
<h1>Posts</h1>

<ul>
{% for post in collections.posts %}
<li>
<a href="{{ post.url }}">{{ post.data.title }} at {{ post.data.date }}</a>
</li>
{% endfor %}
</ul>

這裡用了迴圈來遍歷 collections.posts 這個陣列,並且把文章的 urltitledate 給取出來渲染到畫面上。

就跟前面說的一樣,只要有使用 tags: posts 的文章都會出現在 collections.posts 中,這是 11ty 自動在背後幫我們產生的 collections,所以我們才可以直接在模板中存取到。

除了文章自身的 Front Matter 資訊以外,11ty 也會自動加入一些有用的資訊,像這裡就用到了 url,這是很有用的資料!

建立自己的 collections

除了透過 tags 來產生 collections 以外,也可以透過 .eleventy.js 來添加我們自己的 collections。

雖然剛剛有說我們可以在每一篇文章加上 tags: post 來產生 collection,但如果每一篇文章都要自己手動加其實還蠻麻煩的,對吧?

所以我們可以直接告訴 11ty「請直接幫我把 xx 路徑底下的所有 .md 檔案建立成一份 collections」,像這樣:

1
2
3
4
5
module.exports = function (eleventyConfig) {
eleventyConfig.addCollection('posts', function (collectionApi) {
return collectionApi.getFilteredByGlob('src/blog/posts/**/*.md')
})
}

這邊用了 addCollection 來建立一個新的 collections(post),接著在傳入一個 callback 來回傳這個 collections 的內容。這個 callback 會自動接收一個 collectionApi。如其名,它就是個 11ty 提供的 API,你可以用它來取得你想要的資料,這邊是用 glob 語法來把所有 src/blog/posts 底下的 .md 檔都取出。

透過這段設定後,就不需要再幫每一篇文章都加上 tags: posts 了,可以直接透過 collections.posts 來存取相同的資料。

Pagination

推薦閱讀:https://www.11ty.dev/docs/pagination/

「分頁」應該是很常見的需求,所以這邊來介紹如何在一個頁面中透過分頁來顯示部分資料。

基本範例

分頁背後的原理是利用單一個 template 來產生出多個 template,因為只要讓每一個 template 拿到的資料是不同的,就能渲染出不同的內容了。

這邊來看官網附的範例:

1
2
3
4
5
6
7
8
9
10
11
12
13
14
15
16
---
pagination:
data: testdata
size: 2
testdata:
- item1
- item2
- item3
- item4
---

<ol>
{%- for item in pagination.items %}
<li>{{ item }}</li>
{% endfor -%}
</ol>

假設這個頁面是在 /paged 路徑的話,11ty 就會拿這個模板出產生出 _site/paged/index.html_site/paged/1/index.html 兩個頁面。

要啟用 pagination 的步驟有兩個:

  1. 在 Front Matter 中加入 paginationdata 是用來產生分頁的資料來源,size 則是每一個頁面要顯示幾筆資料
  2. 透過 pagination 物件把資料渲然到 template 中

聽起來不複雜吧!不過重點是 pagination 的內容是什麼?官方已經很貼心的先幫你列出來了:

1
2
3
4
5
6
7
8
9
10
11
12
13
14
15
16
17
18
19
20
{
items: [], // 目前頁面中該出現的資料
pageNumber: 0, // 目前的頁數

hrefs: [], // 所有分頁的路徑(依序)
href: {
next: "…", // 下一頁的連結
previous: "…", // 上一頁的連結
first: "…", // 類推...
last: "…", // 類推...
},

pages: [], // 所有頁面的資料(依序)
page: {
next: {}, // 下一頁的資料
previous: {}, // 上一頁的資料
first: {}, // 類推...
last: {}}, // 類推...
}
}

所以上面用 for item in pagination.items 就可以把當前頁面的資料取出並渲染出來。

11ty 的 pagination 物件提供了很多的有用的資訊,只要知道如何利用這些資訊就可以完成大多數的分頁功能囉。

換頁功能

前面已經介紹過分頁的處理,現在來加上「切換頁面」的功能吧!一樣先來看段範例:

1
2
3
4
5
6
7
8
9
10
11
12
13
14
15
16
17
18
19
20
21
22
23
24
---
pagination:
data: testData
size: 2
testData: [item1, item2, item3, item4]
---

<h1>Paged List</h1>

<!-- 文章列表 -->
<ul>
{% for item in pagination.items %}
<li>{{ item }}</li>
{% endfor %}
</ul>
<!-- 上一頁按鈕 -->
{% if pagination.href.previous %}
<a href="{{ pagination.href.previous }}">Prev</a>
{% endif %}

<!-- 下一頁按鈕 -->
{% if pagination.href.next %}
<a href="{{ pagination.href.next }}">Next</a>
{% endif %}

結構上跟前面的範例差不多,現在只是多用了 pagination.href 的資訊來加上上一頁和下一頁的按鈕而已,相信應該不難理解。

最後渲染出來的畫面會長這樣:

pagination-items

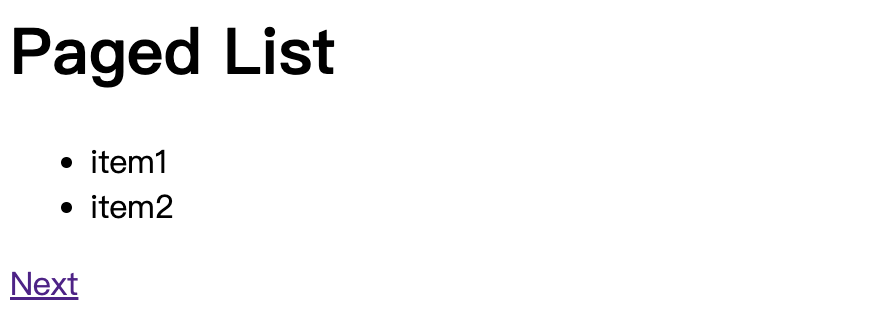
如果你想改成頁碼的形式的話,也可以這樣寫:

1
2
3
4
5
6
7
8
9
10
11
12
13
14
15
16
17
18
19
20
---
pagination:
data: testData
size: 2
testData: [item1, item2, item3, item4, item5, item6, item7, item8, item9, item10, item11]
---

<h1>Paged List</h1>

<!-- 文章列表 -->
<ul>
{% for item in pagination.items %}
<li>{{ item }}</li>
{% endfor %}
</ul>

<!-- 頁碼按鈕 -->
{% for n in range(0, pagination.pages.length) %}
<a href="{{ pagination.hrefs[n] }}">{{ n+1 }}</a>
{% endfor %}

註:頁碼的寫法有很多種,也可以參考官方提供的 範例

這樣子按鈕就會用 1 2 3 4... 的方式來呈現,不過這裡只是示範基本概念,細節的部分就交給你來處理囉!

Ant Design-Tree TypeScript-各種進階使用的技巧
Your browser is out-of-date!

Update your browser to view this website correctly. Update my browser now

×